8.7 KiB
Skills Library
You are here: AI Docs Home > Skills Library
Contents
- Skills vs Agents vs Instructions
- Skills Governance And Sync
- Skills CLI (Single Path)
- How To Connect Skills
- Central Assets Repo
- Next Steps
Skills vs Agents vs Instructions
Short answer:
- Skills = reusable tools or playbooks the AI can call when needed. Like a toolbox for a generalist.
- Custom agents (your /assets/agents/ folders) = specialized AI teammates with their own personality, expertise, and decision-making style. Like building a team of experts.
- Instructions = always-on repo rules that auto-apply by file pattern.
You can get pretty far with just the default agent (the generalist one) + skills, but custom agents unlock a completely different level: turning one smart generalist into a full specialized team.
Why people actually create and use custom agents
Here’s what changes in practice:
True specialization & expertise
- A default agent + “use the React skill” still thinks like a generalist.
- A custom @react-architect agent has deep, baked-in knowledge (your exact component patterns, state management preferences, accessibility rules, performance gotchas). It doesn’t forget or need reminding.
Different thinking styles / risk levels
- @rapid-prototype agent → fast, experimental, okay with temporary hacks
- @production-safety agent → extremely conservative, asks for confirmation on big changes, always checks security/performance first
- @security-auditor agent → thinks about threats, OWASP, secrets scanning before writing a single line You can’t get this reliably just by prompting the default agent every time.
Multi-agent orchestration (the real 2026 power move) Tools like Windsurf Cascade, Claude Code Subagents, VS Code Agents, RooCode, Cline, and even Cursor (via agent handoffs) let agents delegate to each other: Planner Agent → Backend Agent → Frontend Agent → Tester Agent → Reviewer Agent This is way smoother and more reliable than one default agent trying to do everything.
Convenient UX You just type @security review this or switch to the agent in the sidebar. No long prompt every session.
Consistency across sessions & team members The custom agent always behaves the same way. No “mood” variation like the default agent sometimes has.
Curated tool/skill usage You can restrict or prioritize certain skills for that agent only (e.g. the security agent only gets vulnerability-scanning skills and is blocked from deploying).
Real-world analogy
Default agent + skills = One extremely capable senior developer with a huge toolbox. You still have to guide them a lot. Custom agents = You built a small specialized team (architect, frontend wizard, security lead, QA expert). You just assign the right person to the task.
Most power users and big teams in 2026 do both:
- A rich library of skills (your /assets/skills/)
- Several custom agents (your /assets/agents/) that know exactly which skills to use and how.
That’s exactly why having separate /agents/ and /skills/ folders in your repo is such a smart setup.
What Skills Are
Skills are reusable instructions and workflows that guide the assistant through specialized tasks.
When To Use A Skill
- The task has a repeatable workflow.
- You want consistent structure and outputs.
- The task spans multiple files or steps.
Skills Directory
Store skills in the team-approved skills directory for your environment. If you do not know the location, ask your team lead or check your internal setup docs.
Example Question To Ask
Example prompt:
Where is the approved skills directory for our team, and how do I add a new skill?
Skills Governance And Sync
To keep skills consistent across teams, use a central skills registry plus a per-project manifest. Avoid copying skills into every repo unless the skill is tightly coupled to the project.
Recommended Pattern
- Central skills registry repo (single source of truth)
- Project-level manifest that pins required skills and versions
- Sync script that installs the approved set to each developer's laptop
- Agents.md points to the manifest and sync command
Curated Assets Structure (Current)
Keep the approved list in a single repo and organize by platform. This repo already includes the /assets folder as the staging area for a future migration.
/assets/
	setup.sh              ← the installer (auto-discovers everything)
	ios-skills.txt        ← curated iOS skills (one per line)
	android-skills.txt    ← curated Android skills
	shared-skills.txt     ← curated cross-platform skills
	skills/               ← custom skill folders (auto-discovered)
	agents/               ← agent prompt files (auto-discovered)
	instructions/         ← instruction rule files (auto-discovered)
Project Manifest Example
Skills files are plain text. Each non-empty, non-comment line is passed to npx skills add:
# iOS Skills
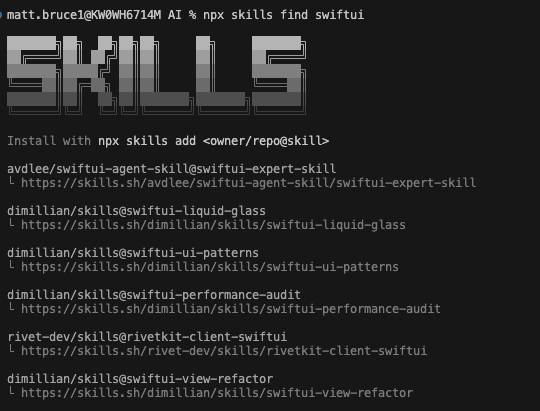
avdlee/swiftui-agent-skill@swiftui-expert-skill
Sync Workflow
- Update the curated list in assets (shared, iOS, or Android).
- Run
./assets/setup.sh skills ios(orandroid,shared). - The script installs each skill using the
npx skillsCLI. - Restart your editor if required.
Example Sync Commands
# Install iOS skills
./assets/setup.sh skills ios

# Install everything (skills + agents + instructions)
./assets/setup.sh all ios

# Remote — no clone required
export ASSETS_BASE_URL="https://gitlab.com/<org>/mobile-ai-docs/-/raw/develop/assets"
bash <(curl -fsSL "$ASSETS_BASE_URL/setup.sh") all ios
Skills CLI (Single Path)
We use a single, approved path: update the curated list under assets/ and run the sync script. The sync script calls npx skills add for each entry.
Where To Find Skills
- Homepage: https://skills.sh/
- Docs: https://skills.sh/docs
- CLI reference: https://skills.sh/docs/cli
How It Works (High-Level)
- You update
assets/shared-skills.txt(or a platform list) with approved install entries — one per line. - Run
./assets/setup.sh skills(orskills ios,skills android). - The script uses
npx skills addto install each entry.
Install The CLI (No Global Install Required)
The CLI runs via npx, so you do not need a global install.
Example Install Entry
Add one line to the platform file (e.g., ios-skills.txt):
avdlee/swiftui-agent-skill@swiftui-expert-skill
Notes
- The leaderboard uses anonymous telemetry from the CLI. You can opt out by setting
DISABLE_TELEMETRY=1. - Review skills before installing. The ecosystem is audited, but quality varies.
skills CLI Commands
Common commands shown in the CLI help output:
npx skills add <package>     Install a skill
npx skills list              List installed skills
npx skills find [query]      Search for skills
npx skills check             Check for updates
npx skills update            Update all skills
npx skills remove            Remove installed skills
npx skills init [name]       Create a new skill
How to Download Existing Skills
Run the setup script:
./assets/setup.sh skills ios
Or remotely without cloning:
bash <(curl -fsSL "$ASSETS_BASE_URL/setup.sh") skills ios
How to Download Agents
Run the setup script:
./assets/setup.sh agents
Or remotely without cloning:
bash <(curl -fsSL "$ASSETS_BASE_URL/setup.sh") agents
Agents are installed to ~/.copilot/agents/ by default. Override with the AGENTS_DIR environment variable.
How to Enable or Configure Skills
- Follow the instructions provided in each skill's README or SKILL file.
- Some skills require additional setup, such as environment variables or tools.
How To Connect Skills
- State the primary skill you want to use.
- Provide the inputs that skill expects.
- If needed, add a secondary skill and explain the handoff.
Example Skill Request
Example prompt:
Use swiftui-expert-skill to review this view for best practices. Then use webapp-testing to validate the web flow.
Central Assets Repo (Recommended)
Do not list every skill in this guide. Instead, point readers to the assets folder (or a future dedicated repo) that contains the approved agents, skills, and instructions.
Everything is installable with one command:
./assets/setup.sh all ios
- A short README with install and update steps
- Curated skill lists (for example, ios-skills.txt, android-skills.txt)
Link To The Assets Repo
- Repo (current project source): assets/
Next Steps
- For day-to-day workflows, read Cross-Platform AI Usage.
- For setup issues, follow Troubleshooting and FAQ.